
maddy puff dress pattern review
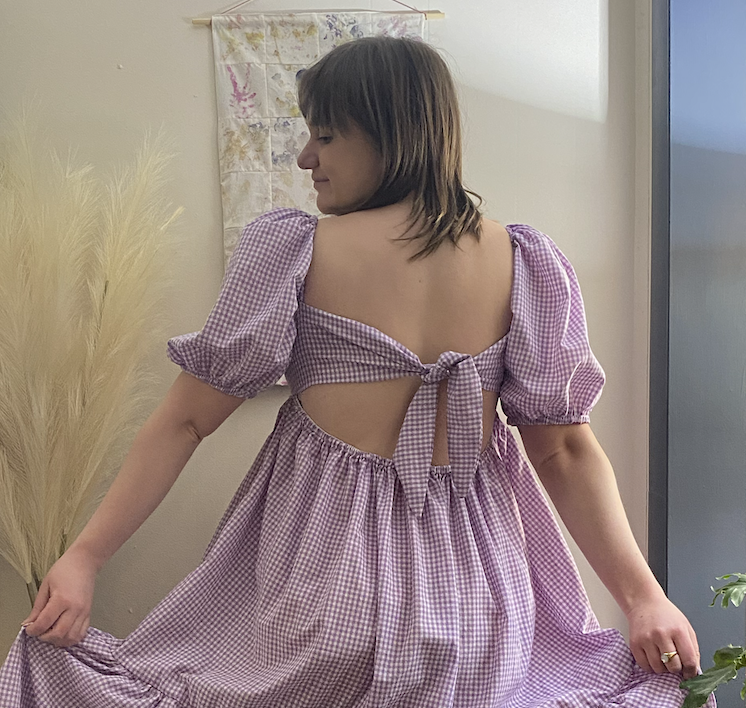
The Maddy Puff Dress by Ruby Sews is a perfect DIY puff sleeve dress sewing pattern for spring and summer. It is light and flowy, has a square neck, and has an incredible open back detail. It can also be made as either a mini dress or a maxi dress. If you are looking to sew a Selkie style puff sleeve dress, this is the sewing pattern for you.
I made the Maddy Puff Dress by Ruby Sews as a birthday/Valentine’s day dress, and ended up hacking it into a maxi dress rather than a mini dress. I live in Montana, and February is one of the most brutal winter months, so I needed a dress that would hide my long underwear. Thankfully, the Maddy Puff Dress fit my needs perfectly - it is soft and romantic, and with the longer hem line that I hacked, I was able to wear long wool socks and boots with it no problem.

The Maddy Puff Dress pattern is:
inexpensive - the pattern itself is about $5 USD and only requires 2 yards of fabric
an easy sewing pattern - if you know how to sew darts and gather fabric, you can make this!
a fun take on a puff sleeve dress sewing pattern
skills needed to sew the Maddy Puff Dress
sewing darts
gathering fabric with a sewing machine
bias tape binding
If you are familiar with how a sewing machine works, you can sew the Maddy Puff Dress! Between cutting and sewing (especially if you are making it as a mini and not a maxi dress), this project should take you between 3-4 hours.
materials needed
2.25 yards fabric (for the hacked longer version, I bought a total of 4 yards)
printer & paper
sewing machine
elastic
bias tape
review of the Maddy Puff Dress sewing pattern
The Maddy Puff Dress sewing pattern by Ruby Sews is an amazing introductory pattern. On her website, Ruby has this pattern listed as intermediate, but I truly believe it is a beginner sewing pattern.
The sewing pattern itself comes with only three pattern pieces - the front bodice piece, the back ties, and the sleeve. Since the skirt is just a rectangle, Ruby recommends that you just cut a rectangle directly from the fabric based on your measurements.
My only qualm about the sewing pattern is that it isn’t super size inclusive - Ruby offers sizes US 2-14. I hope to see a more inclusive range in the future, on both the smaller and larger ends.
hacking the skirt to make a longer, tiered effect
This sewing pattern hack was so simple! I made the dress in AU size 14, which requires the skirt to be 144cm wide for the front, and 138cm wide for the back (although to be honest, I made both skirt panels the same width).
To make a tiered skirt, you need to have each successive tier wider than the tier above it. So if your front panel for the first tier is 144cm wide, you want the front panel for the second tier to be at least 1.5x the width of the top panel. In this case, the front panel for the second tier would be 216cm. For the length of the second tier, I just halved the length of the first tier’s skirt panel. So the first tier was 50cm in length, and I made the second tier 25cm in length.
For the bottom ruffle I did the same math - if my third tier was 216cm for the front panel, then the ruffle had to be 324cm. I halved the fabric length once again for the ruffle, making the length 12.5cm.
The only issue that I ran into was that since I only bought a total of 4 yards of fabric, I didn’t have a long enough continuous length of fabric to cut each of the tiers as two pieces - one front and one back. I ended up cutting them each into four separate pieces and sewing them together. Since I used the small gingham print, I don’t think you can tell unless you’re REALLY looking.