
how to sew a quilt vest
If you had the same Instagram Feed as I did this winter, you know that quilted jackets were EVERYWHERE. Some jackets were sewn from existing quilts, like this one I made last fall. Others were made from patchworks made specifically for the garments. Either way, I couldn’t scroll any of my social media pages without seeing at least one gorgeous quilt jacket.
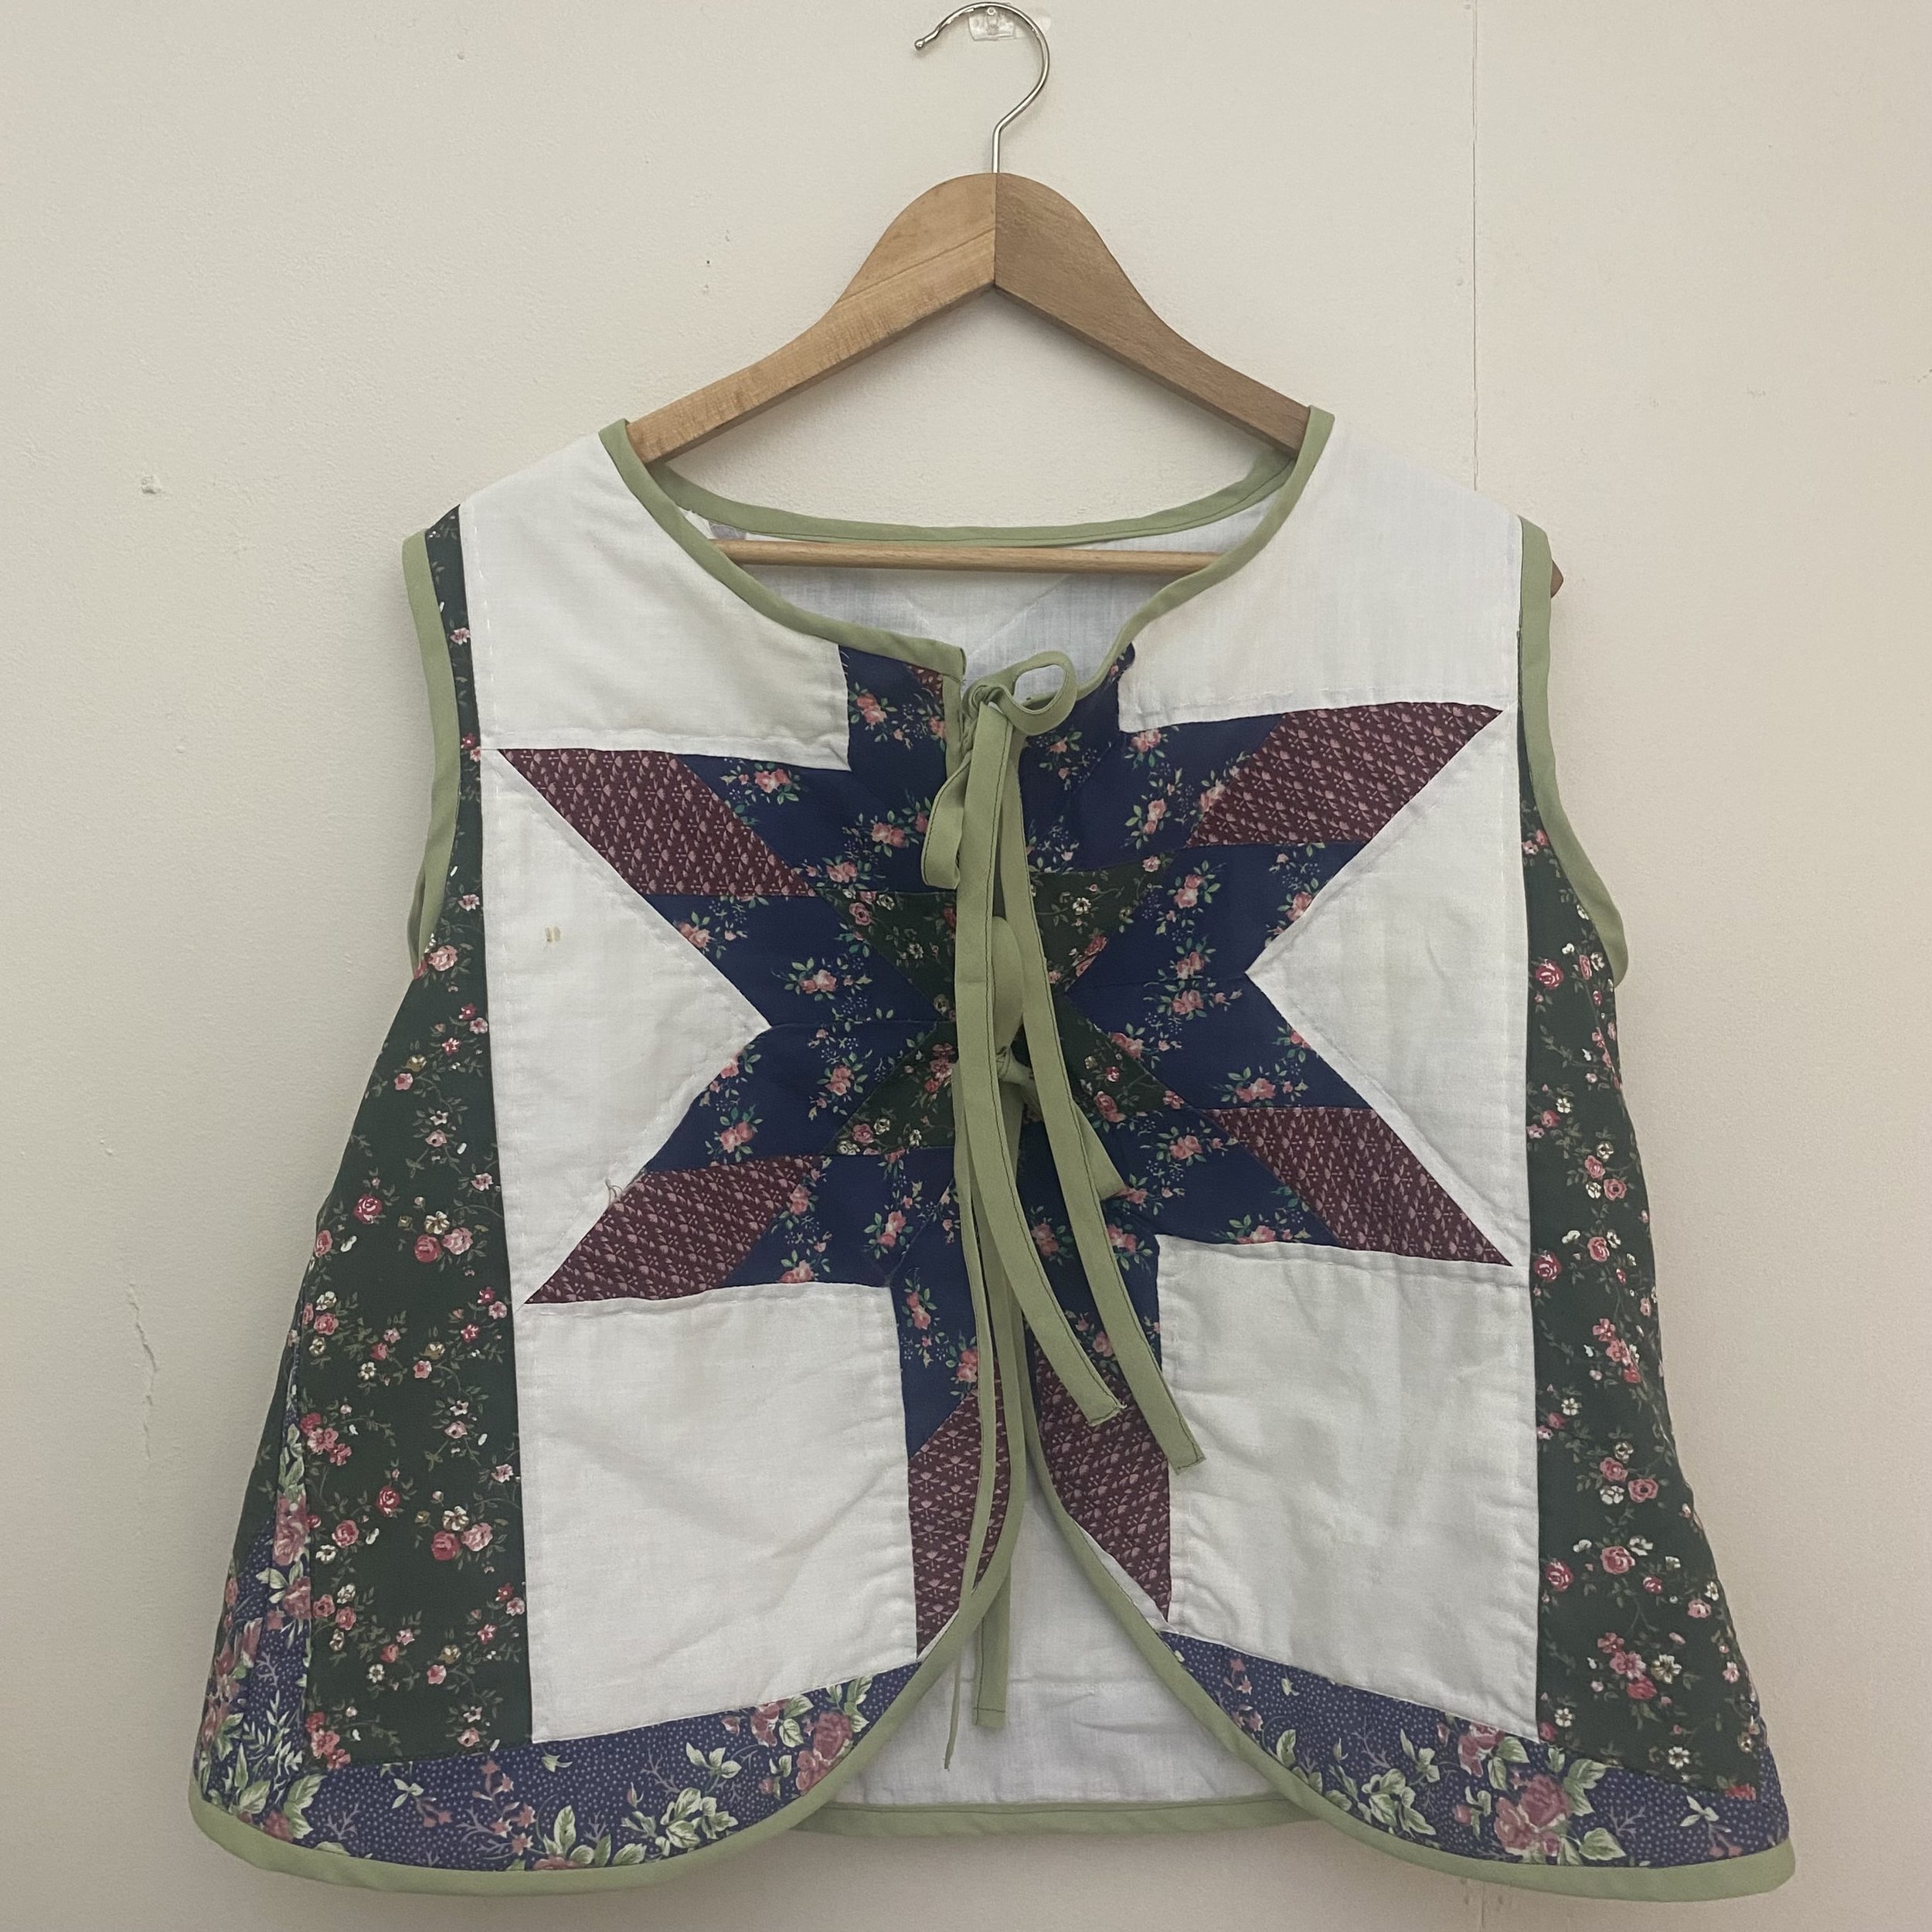
With summer just on the horizon, I was craving a way to wear quilted designs without sweating in a coat. And thus the quilt vest was born.
A quilt vest is perfect for spring, summer, or fall. Just layer it over a turtleneck for a cool-weather look, or style it more as a tank top for summer. And don’t worry about your bra showing — the front ties make it so that your bra underneath is nearly invisible.
quilt vest tutorial
For this quilt vest tutorial, we will be using a modified version of the Orchards Dress pattern by Vivian Shao Chen. If you already have a basic shirt pattern, feel free to use that instead. If you’ve never hacked a sewing pattern before, don’t worry! We will be doing a very simple modification.
materials needed
a quilt! I used two pillow shams that came with a thrifted quilt set. If you’re using a whole quilt, you should have enough fabric for 2-3 quilt vests.
matching thread
9 yd extra wide double fold bias tape
sewing machine
iron
diy quilt vest instructions
make sure to come back and put in exact pattern pages and measurements
hacking the Orchards Dress pattern
First, print and cut out the Orchards Dress pattern. You will only need pattern pieces A and B for the front and back bodice. On the printable pattern, that corresponds to pages 1-4 and 11-14.
Cut off the button placket from the front pattern piece - we won’t need that for the quilt vest.
Next, we will need to lengthen the front and back bodice. Measure from your waist to where you want the quilt vest to hit — I chose where jeans normally fall on my hips. For me, this was 5”. Add this length to the bottom of your pattern piece.
Then, on the front pattern piece, cut a rounded corner at the bottom center. Don’t worry about making this curve perfect.
Finally, we are going to slash and spread the extra length that we just added to the bottom of the pattern piece. This will give the quilt vest more of a swoopy silhouette, rather than a boxy one.
To slash and spread, cut from the hem of both your front and back pattern pieces, to 1/2” away from the waist line (or where you extended the pattern piece from). You want to have 6 slashes total. Next, spread the strip along the side seam 2”. Move each other subsequent spread about 1/2” toward the side seam, but leave the strip along the center seams as is.
For a more in-depth tutorial on how to slash and spread, refer to this Youtube tutorial.
cutting the fabric

Lay your pattern pieces on your quilt, making sure to pay attention to any designs in the quilt that you want featured in your vest. For example, I loved the quilted star on the pillow shams that I used, so I wanted those to be featured in the center front and back of my vest. Therefore, I laid my pattern pieces so that the stars would be in the center after I cut them.
If your quilt is very thick, you may want to trim some of the batting, or the fluffy filling inside of it, around the edges. This will make it easier for you to sew and hem.
sewing the quilt vest
First, attach your quilt vest together at the shoulder and side seams. I opted to finish my seams using bias tape, but you could use a zigzag stitch or an overlocker instead. I think the bias tape seams made for a cleaner final product, but it does add more time to the project.
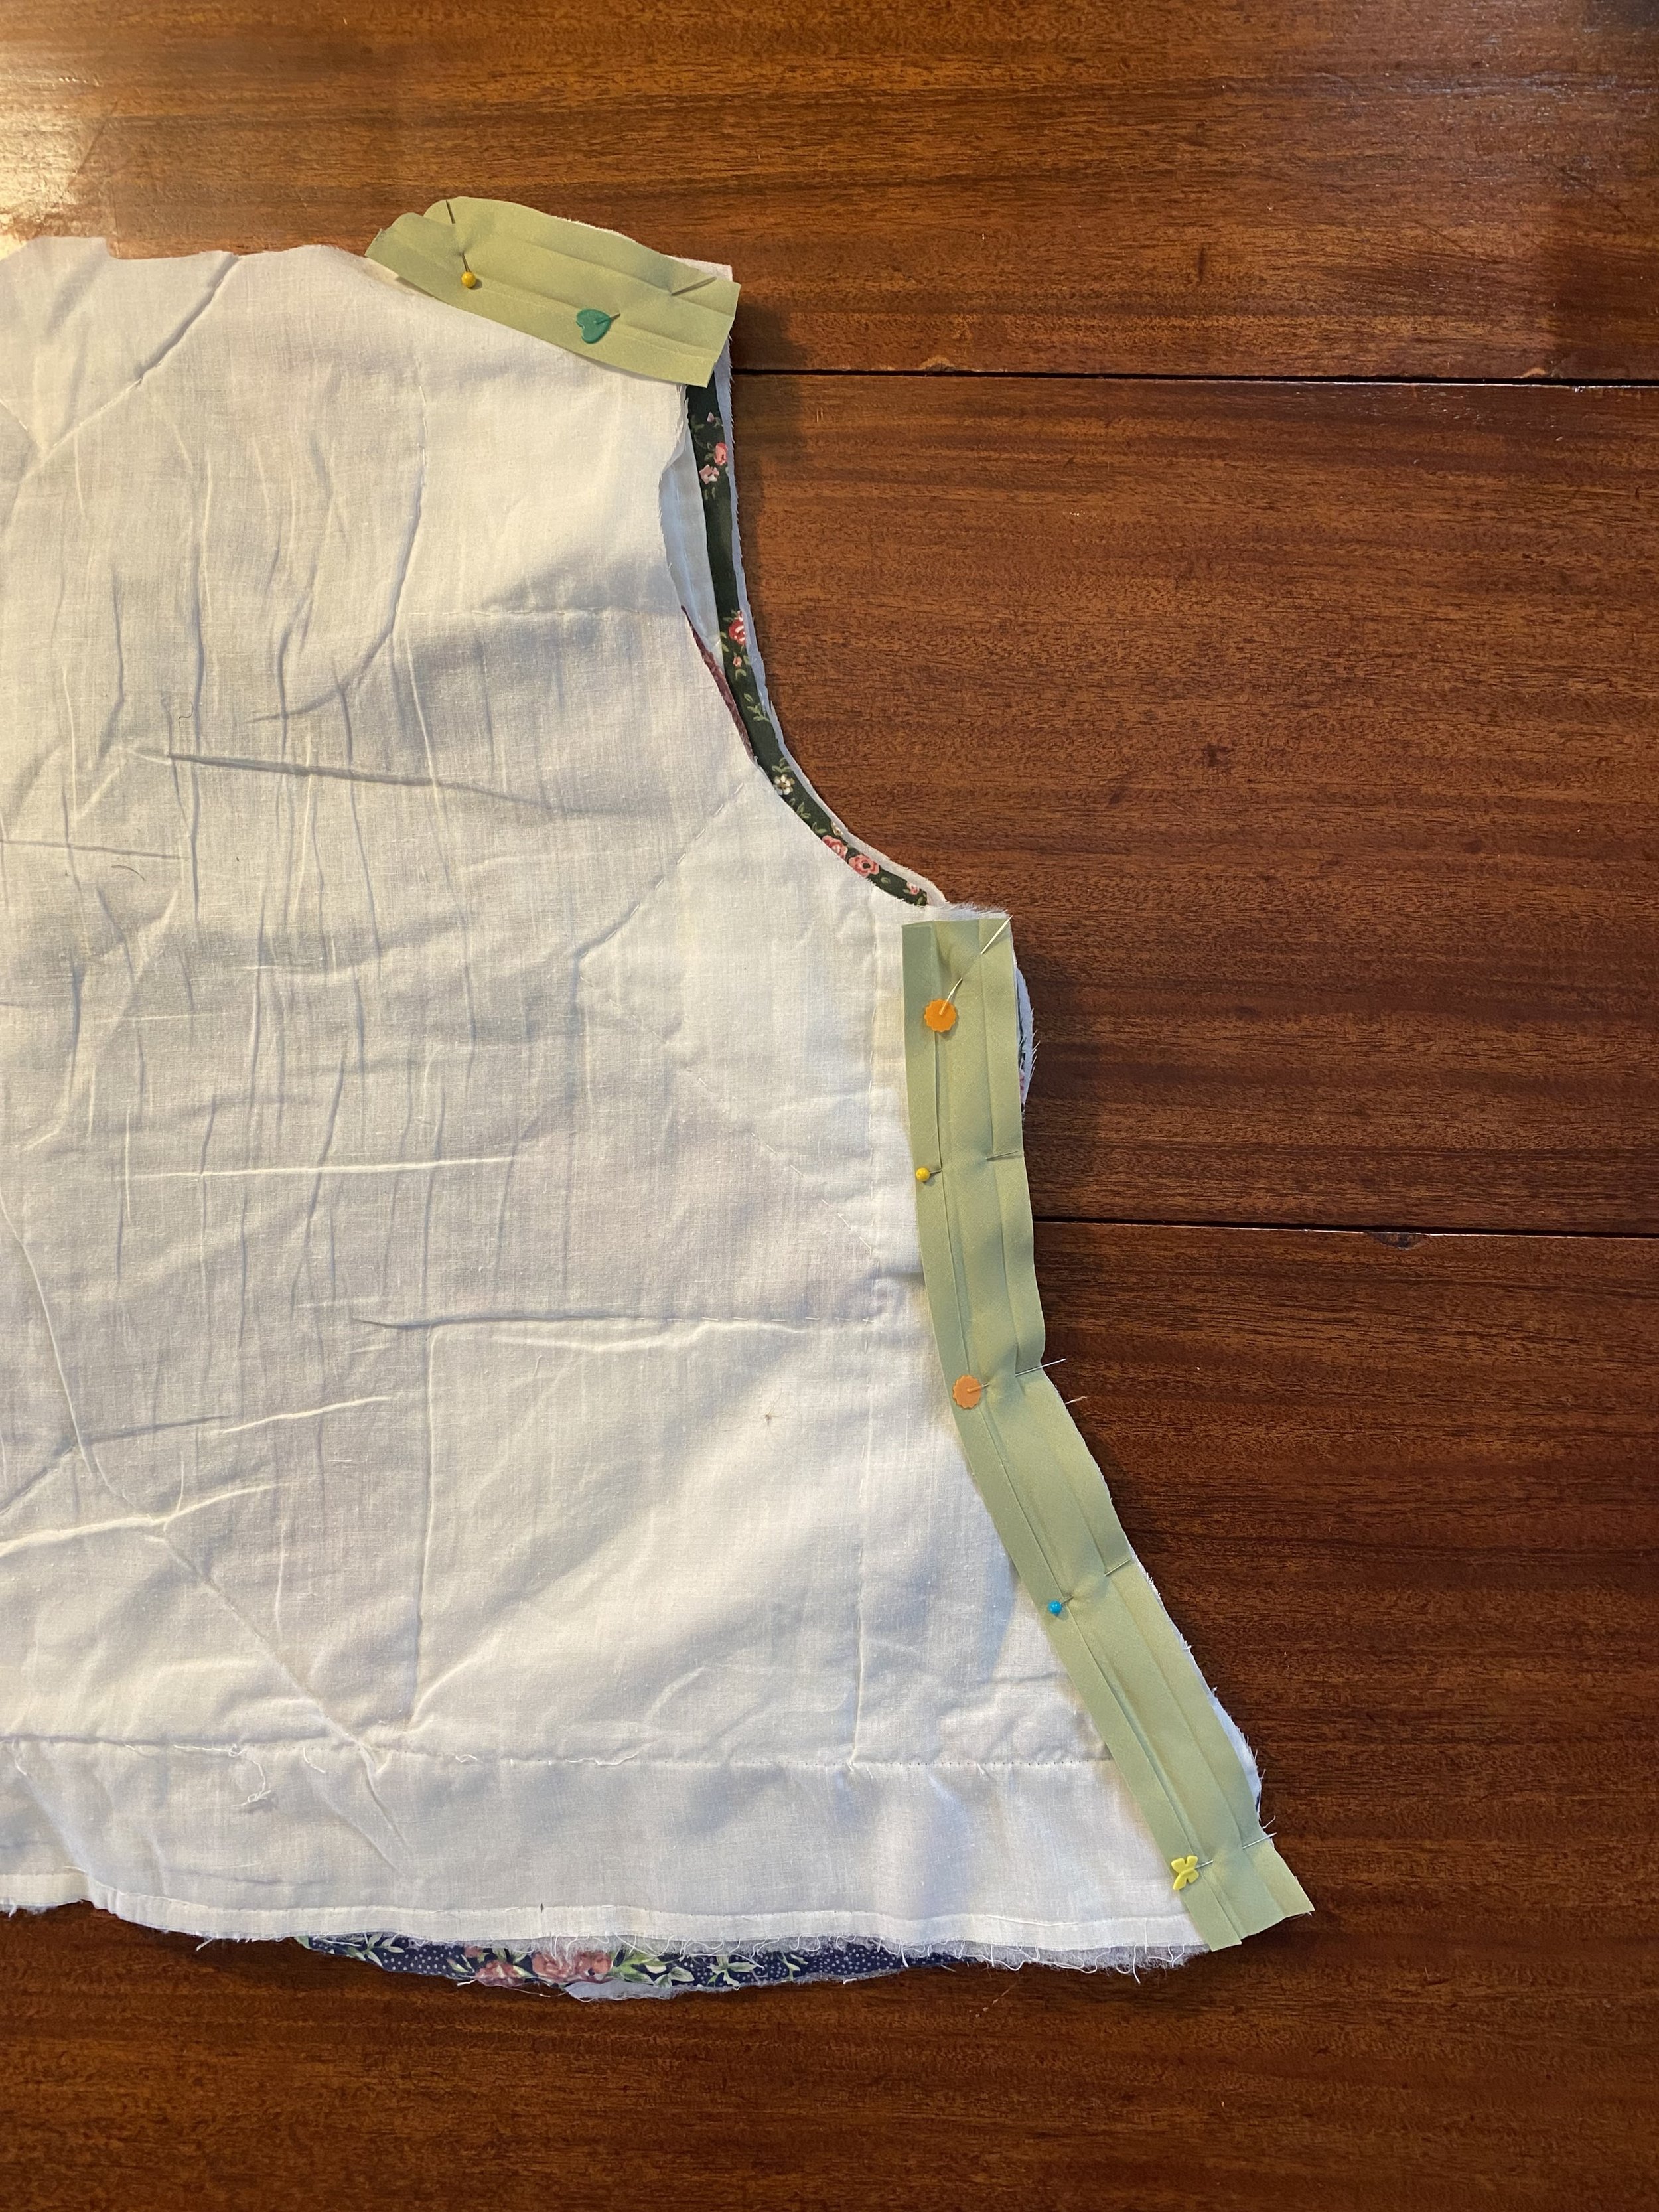
Next, using the bias tape, finish the sleeves and collar. Refer to the video below for the full instructions on how bind off a raw edge using bias binding. The bias tape will be visible.
Now we are going to make ties for the center front. Using the same bias tape, cut a four pieces of the tape that are 12” long each.
On one end of all four pieces, fold the end in twice and sew along the top (short) edge. This will keep the end from fraying in the finished vest. Then, sew the long open edge of all four pieces. It’s ok to leave the other short length a raw edge — it will be sewn into the center front of your vest later.
Next, pin your four ties to the wrong side of the quilt vest, two on each side. You want to put the first tie at the top, and the next one 5” below that. At this point, try on your vest and test the ties, making sure they are in a good spot to be able to wear the vest without a shirt underneath, without revealing too much.

Finally, using one long continuous length of bias tape for both center fronts and the hem, finish the center front and hem of the vest, making sure the ties don’t get caught in the binding.
Finishing touches
The last step is to give everything a good press with your iron and snip any loose threads. After that, you should have a gorgeous, completed quilt vest!

If you make this tutorial, please make sure to either comment down below, or tag me @threadrosecrafts on social media. I would love to see your quilt vests!