
How to Print and Paste a PDF Sewing Pattern
Did you just buy a sewing pattern from your favorite online sewing creator, and now you are left with a jumble of confusing file sizes and instructions? You’ve come to the right place. This is a complete guide on how to print a sewing pattern at home.

PDF Sewing Pattern Printing Materials
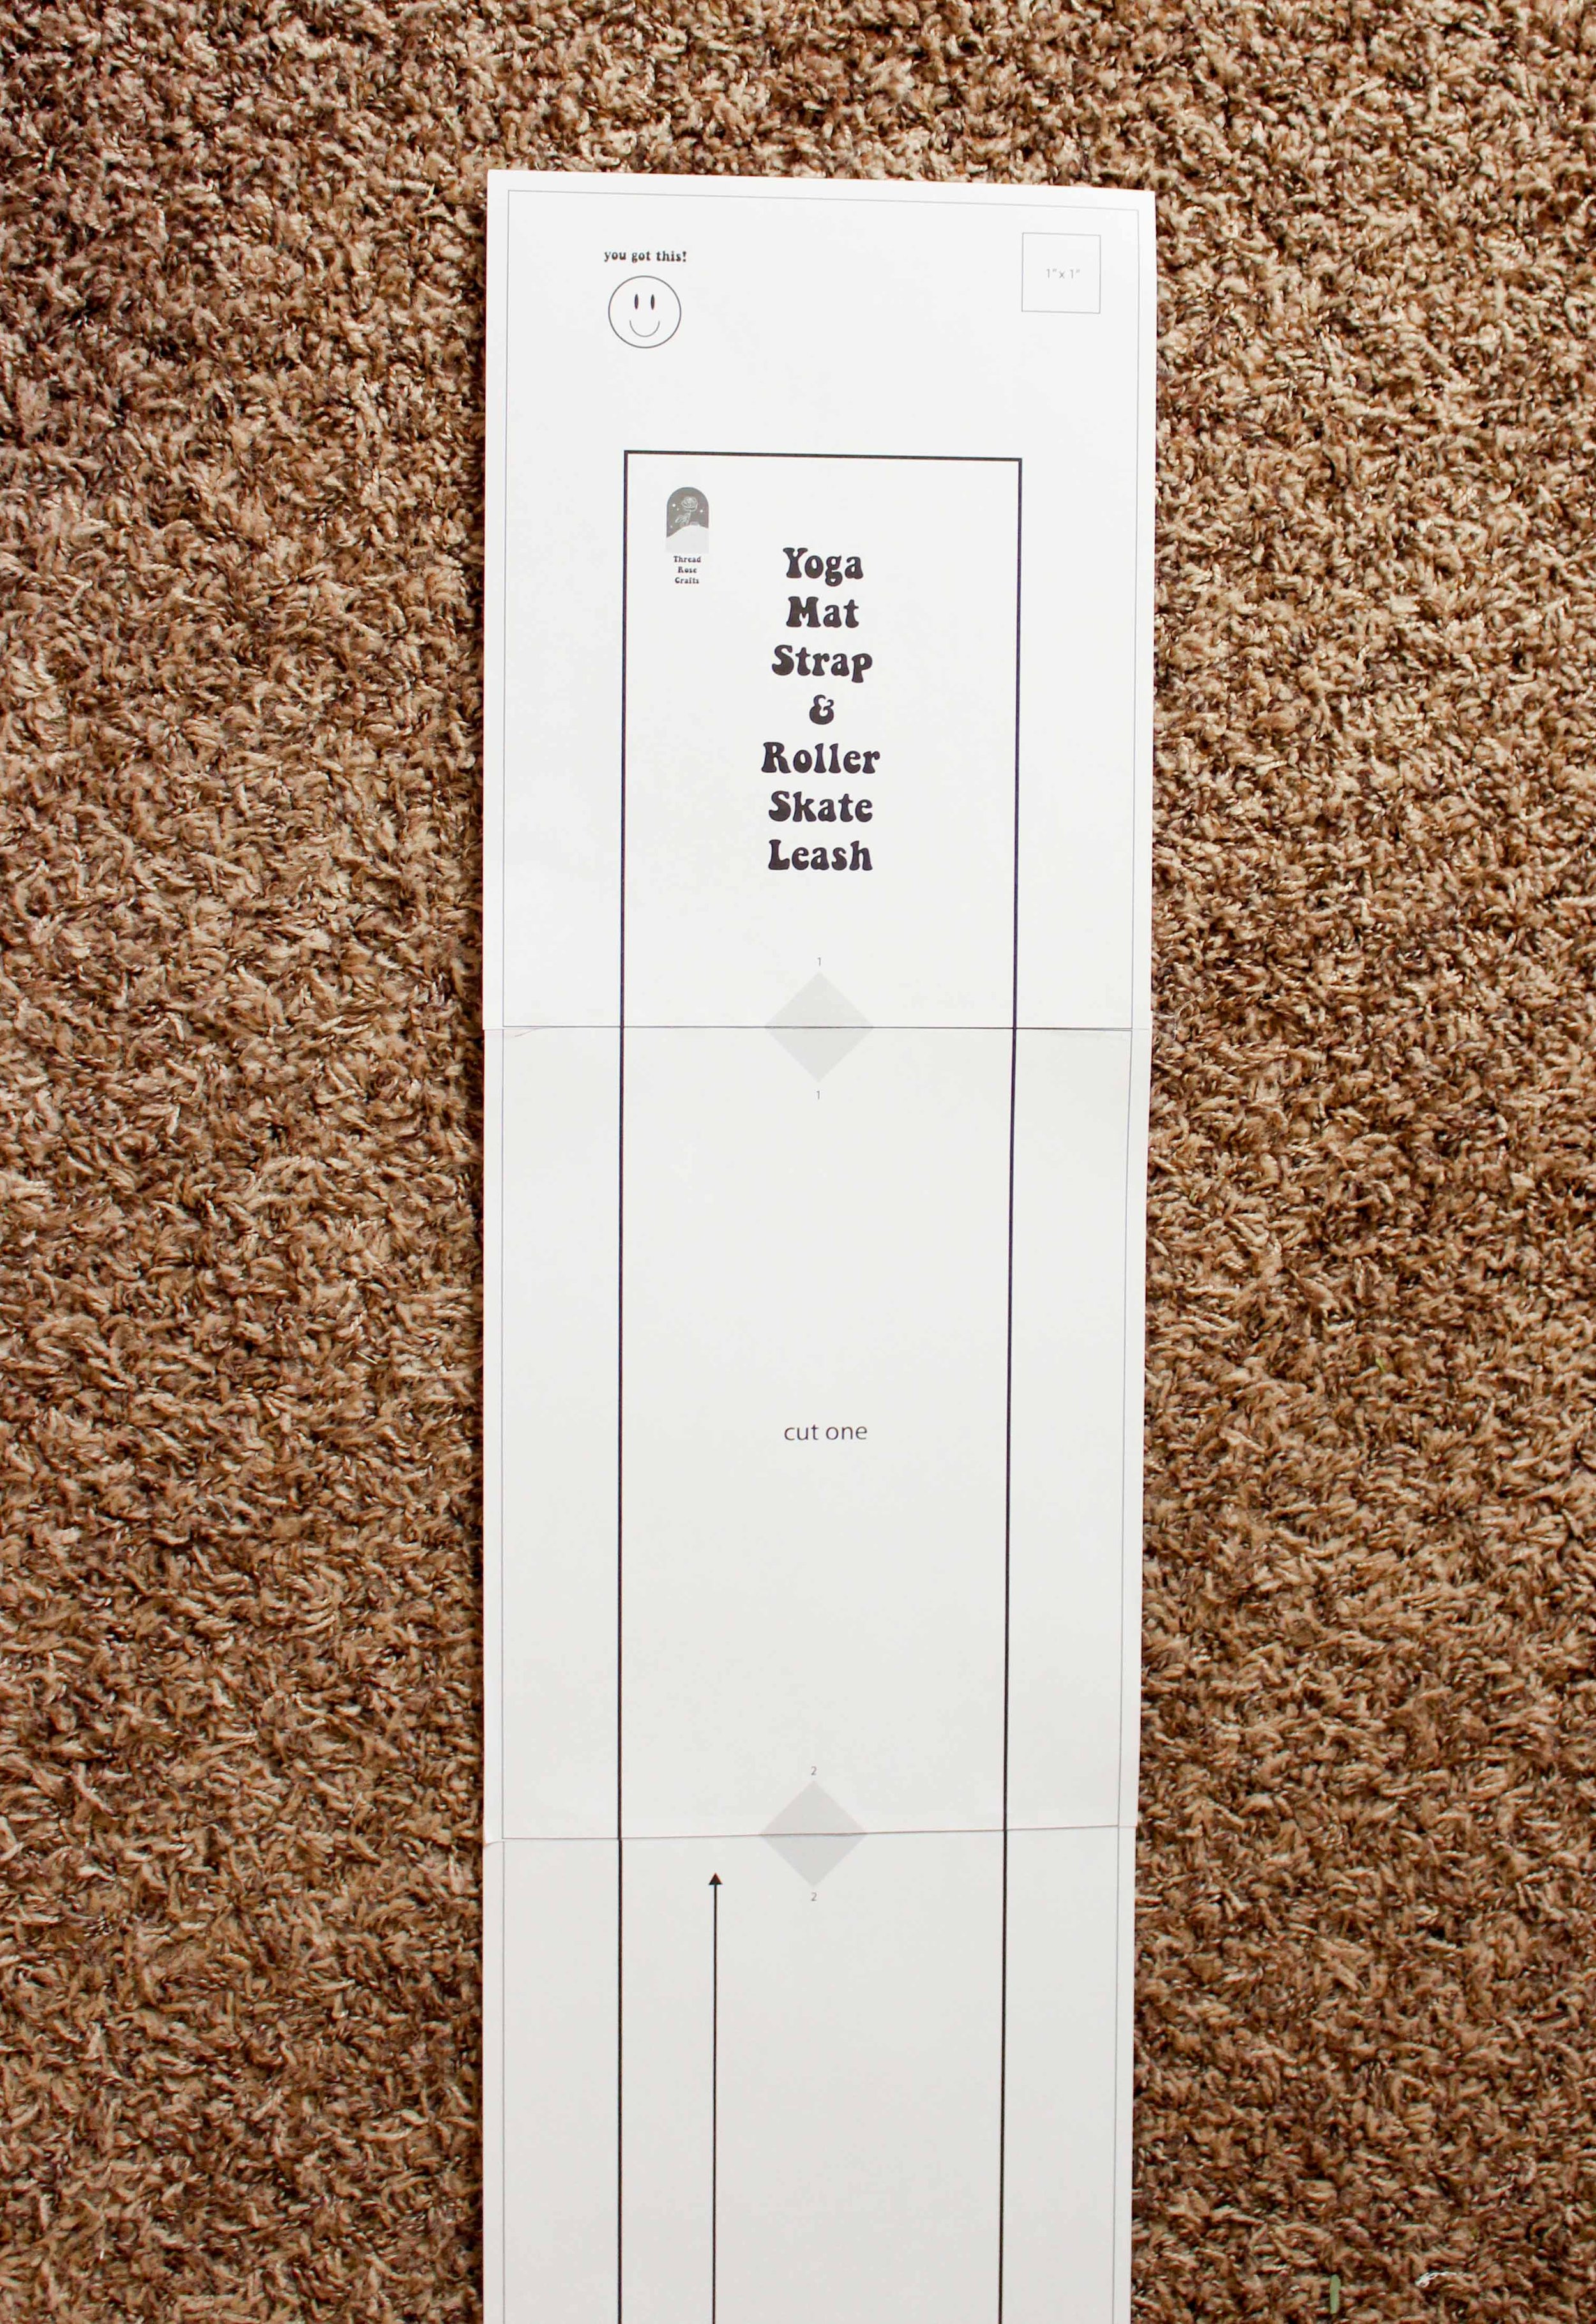
PDF Sewing pattern (like my Free Yoga Mat Strap Sewing Pattern)
Printer with paper and ink
Scissors
(optional) Paper cutter
Ruler or tape measure
Glue or Tape
My Sewing Pattern History
Acquiring a sewing pattern used to be easy. I would go to Joann Crafts with my grandmother and sift through the drawers of patterns until I found the most fabulous pattern in the store. Then, I would leave with an envelope filled with a pattern printed on fragile tissue paper and an instruction booklet.
While those commercial patterns are still available at big box hobby stores, the sewing community has made a big shift to supporting smaller, independent pattern designers. These patterns are often trendier, more thoughtful in design, and (big bonus) you can reach out directly to the creator with questions about the pattern.
But without an envelope with a tissue paper pattern inside, how are you going to translate the pattern from screen to fabric?
How to piece together a PDF sewing pattern
Step one: choosing the correct file
POV: You buy a sewing pattern online, download the provided file, and you are met with a jumble of content. Where do you go next?

For the sewing pattern file above (the Anna Allen Demeter Dress), there are three printing options. The first two are designed to be sent to local printers and then printed at a large scale. If you have this option, I highly recommend you give it a try.
My local printer will print sewing patterns for approximately $5 a pattern. When you factor in ink, paper, and time spent gluing together a PDF sewing pattern, it can be worth sending the file in to a printer.
For the purpose of this tutorial, you’re going to want to select the “Print at Home” file. Depending on where in the world you live, this will be either A4 or Letter size.
Once you have selected the correct file, it is very important to make sure that the scale on your printer is correct. Make sure you select scale: 100%. Otherwise, the pattern will not print the correct size.
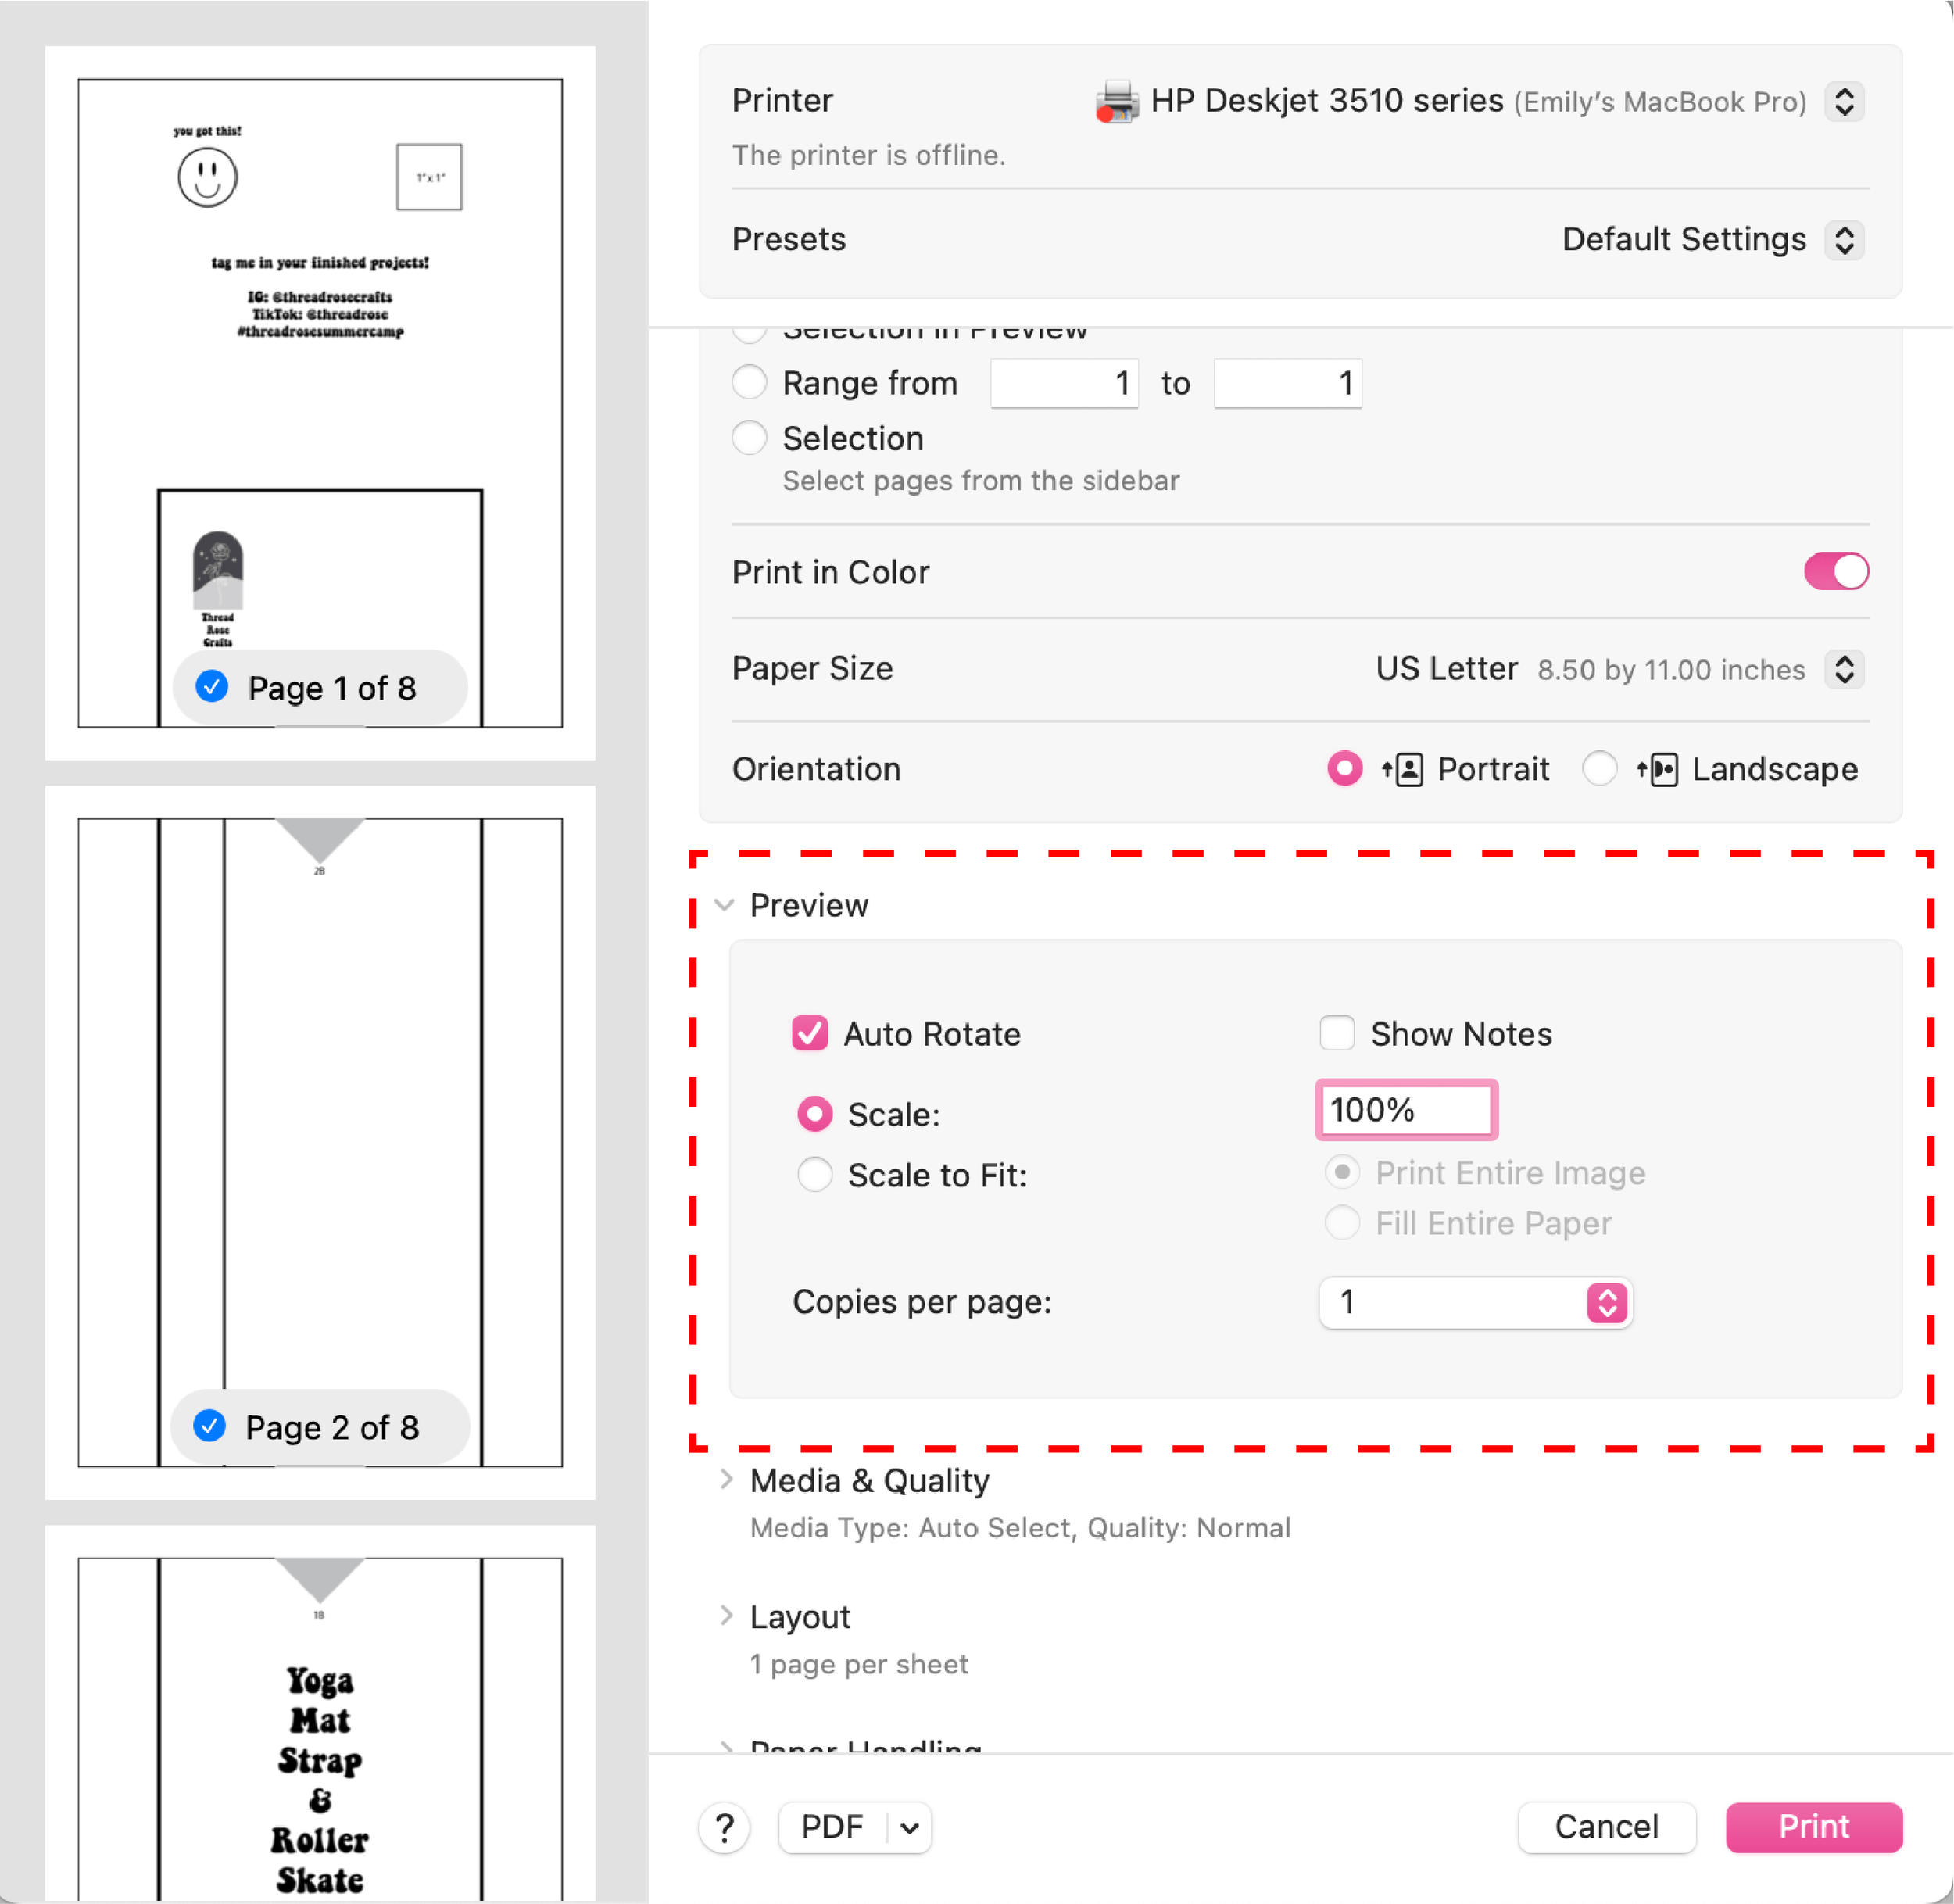
Step Two: Measure the gauge square
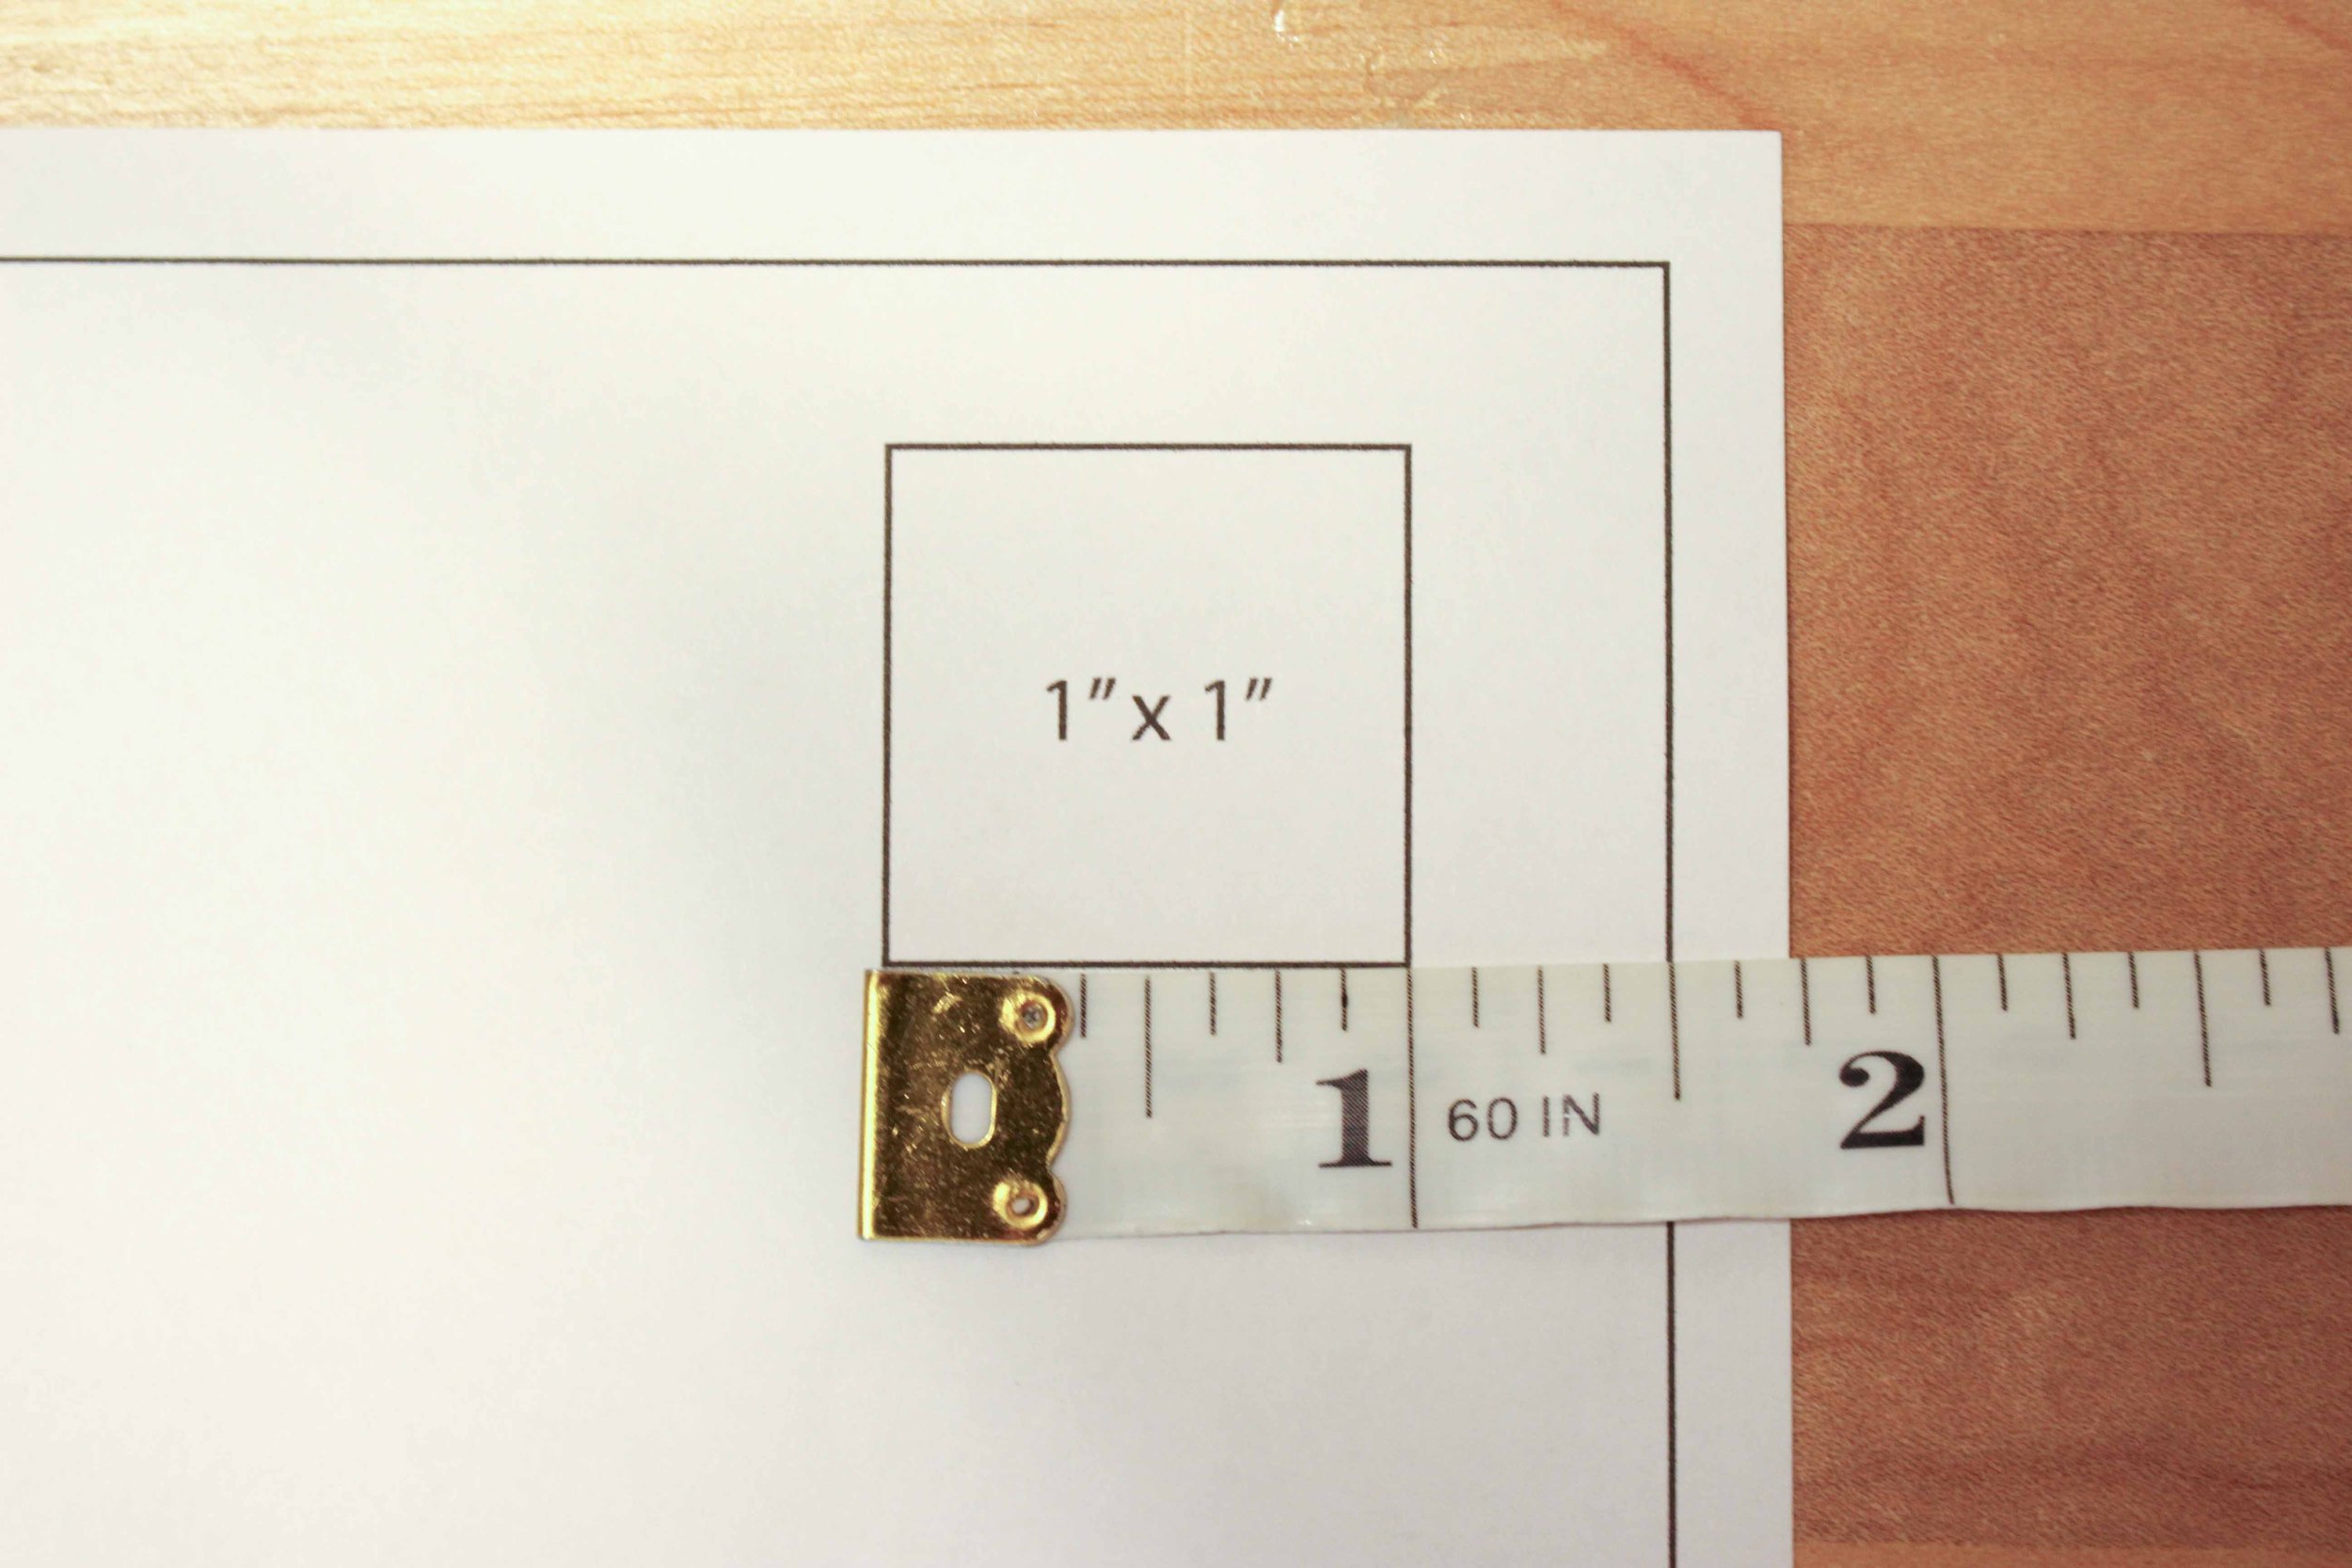
Every PDF sewing pattern will have a small test square somewhere on the pattern to make sure the pattern wasn’t distorted when printing. Using a ruler, measure the gauge square, ensuring that the measurement is correct. If not, adjust your printer settings until your gauge square comes out the right size.
Step three: Cut the bottom edge and right side margins
This step is where a paper cutter is helpful, but not required. A paper cutter helps you get a perfectly straight line.

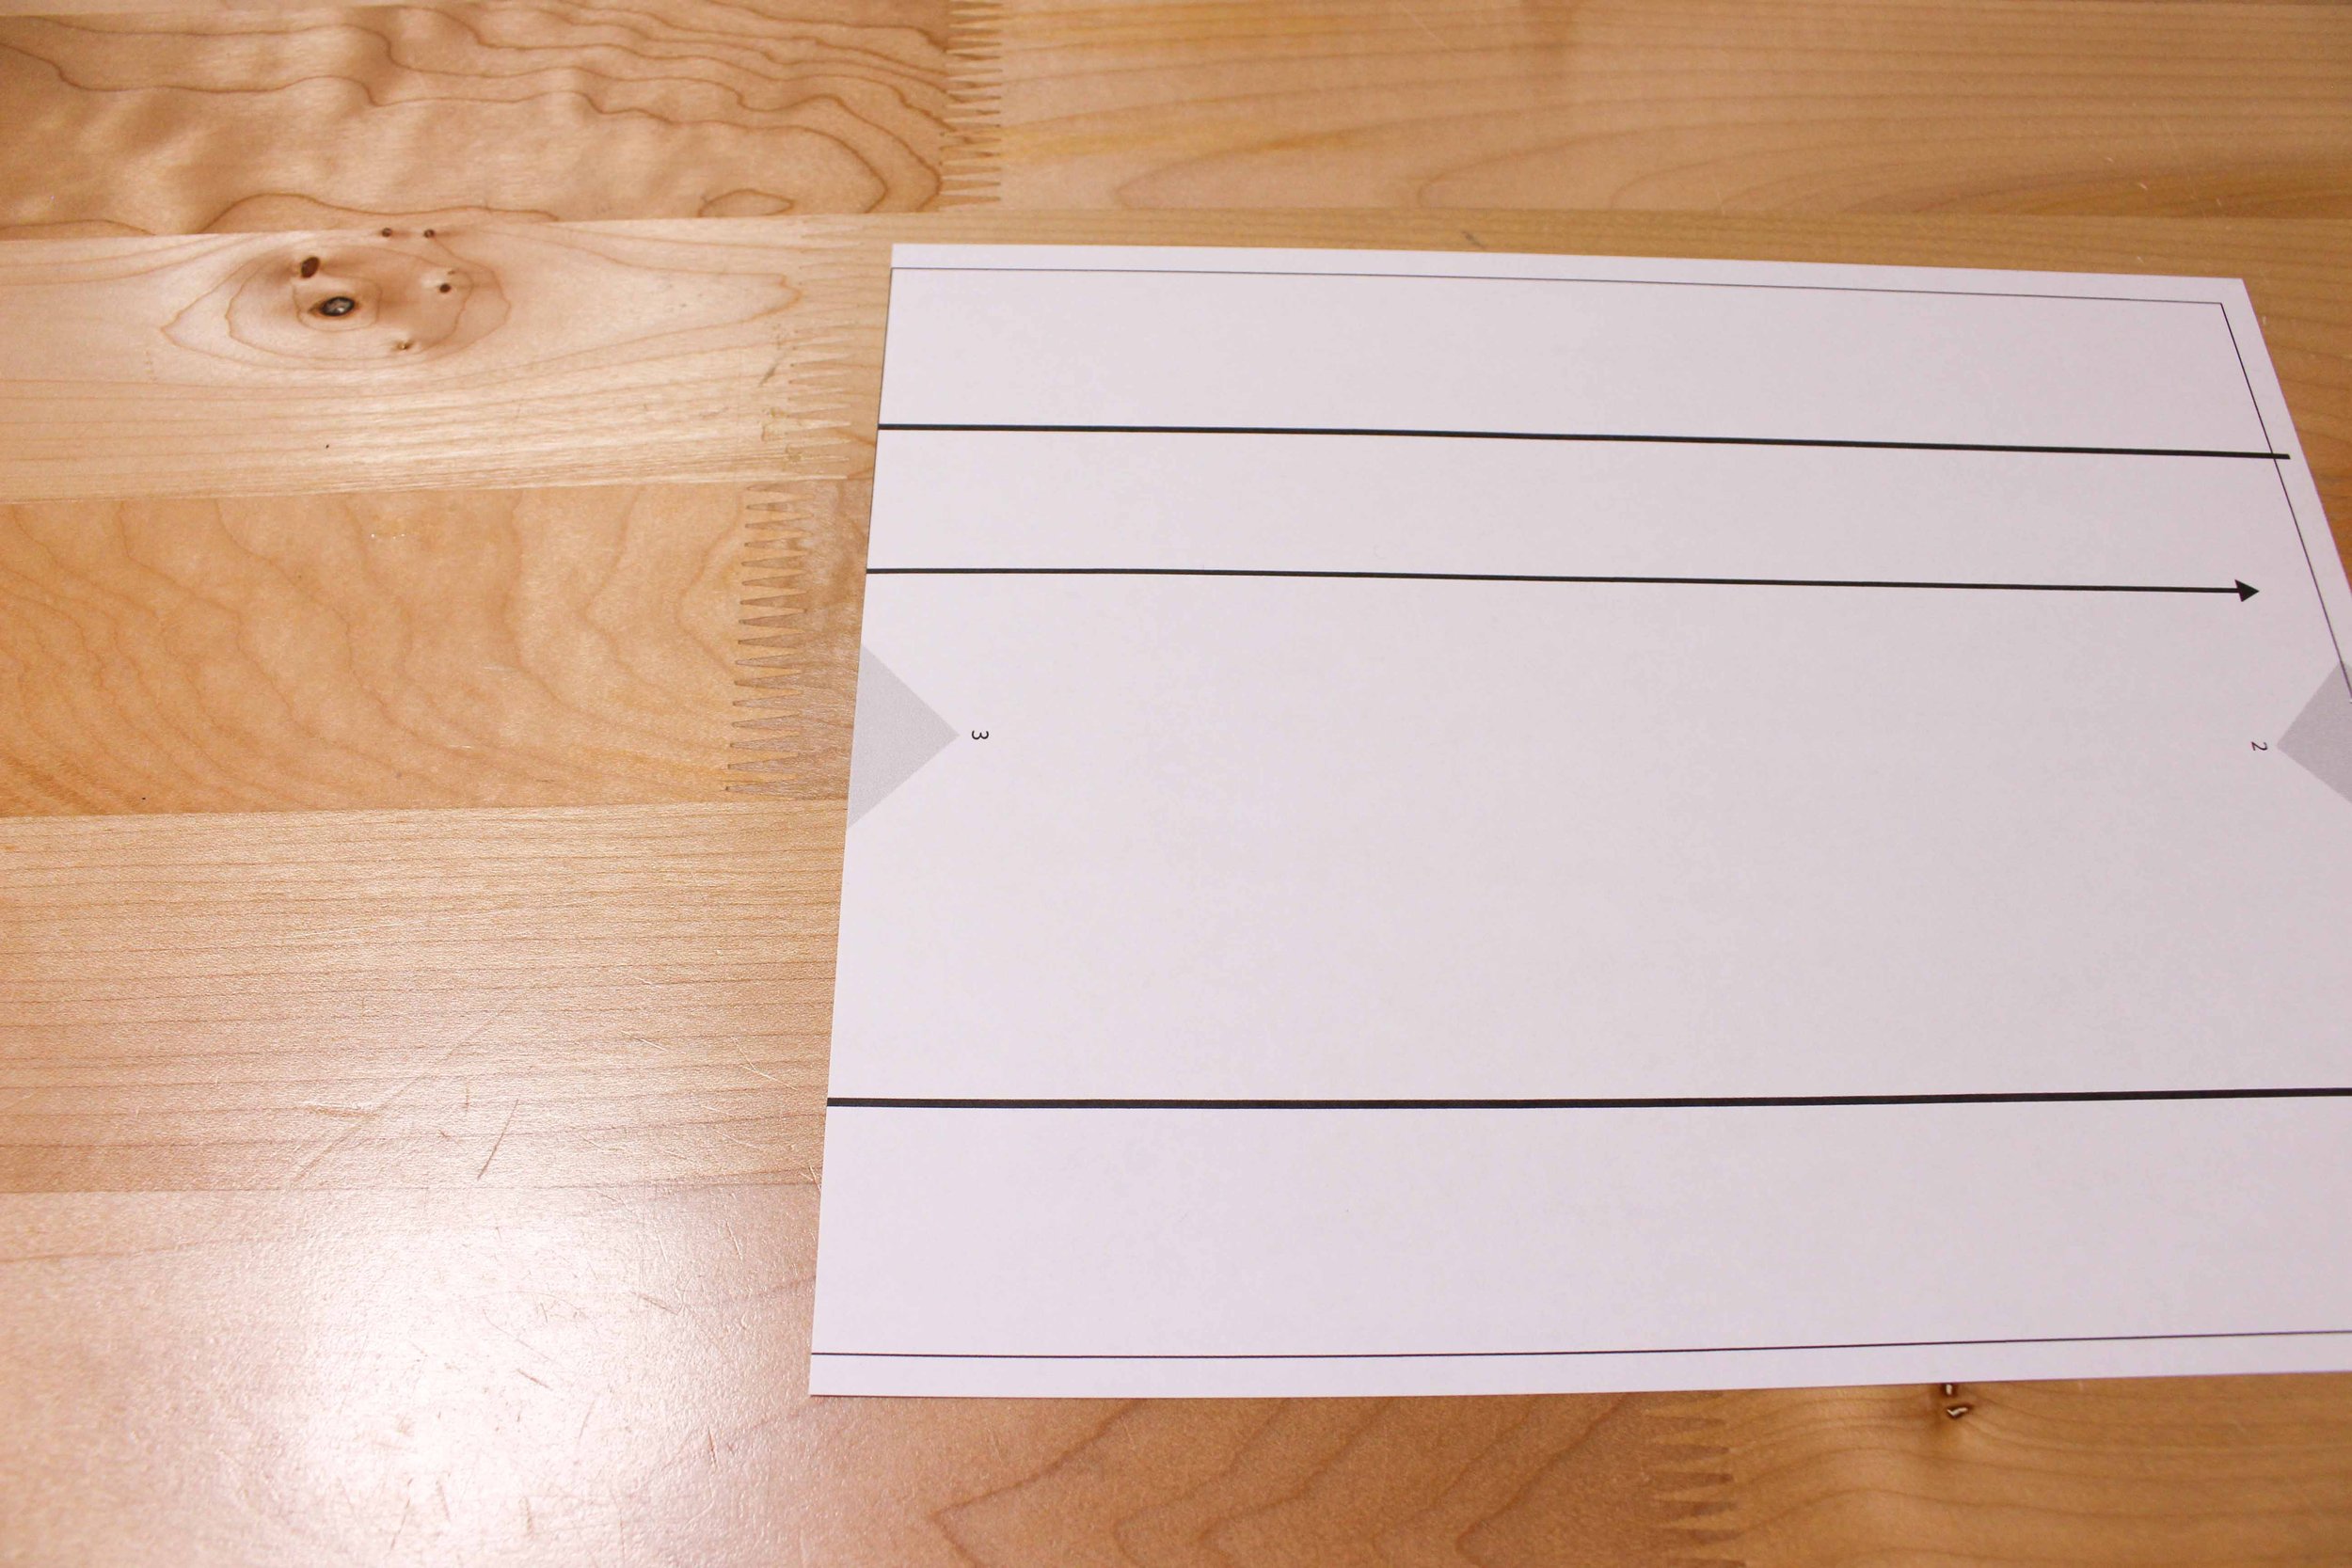
The next step is to cut off two edges of each page of the sewing pattern. We are going to cut the bottom edge and right side edge, leaving the top and left side margins in tact. This will be crucial in the next step.
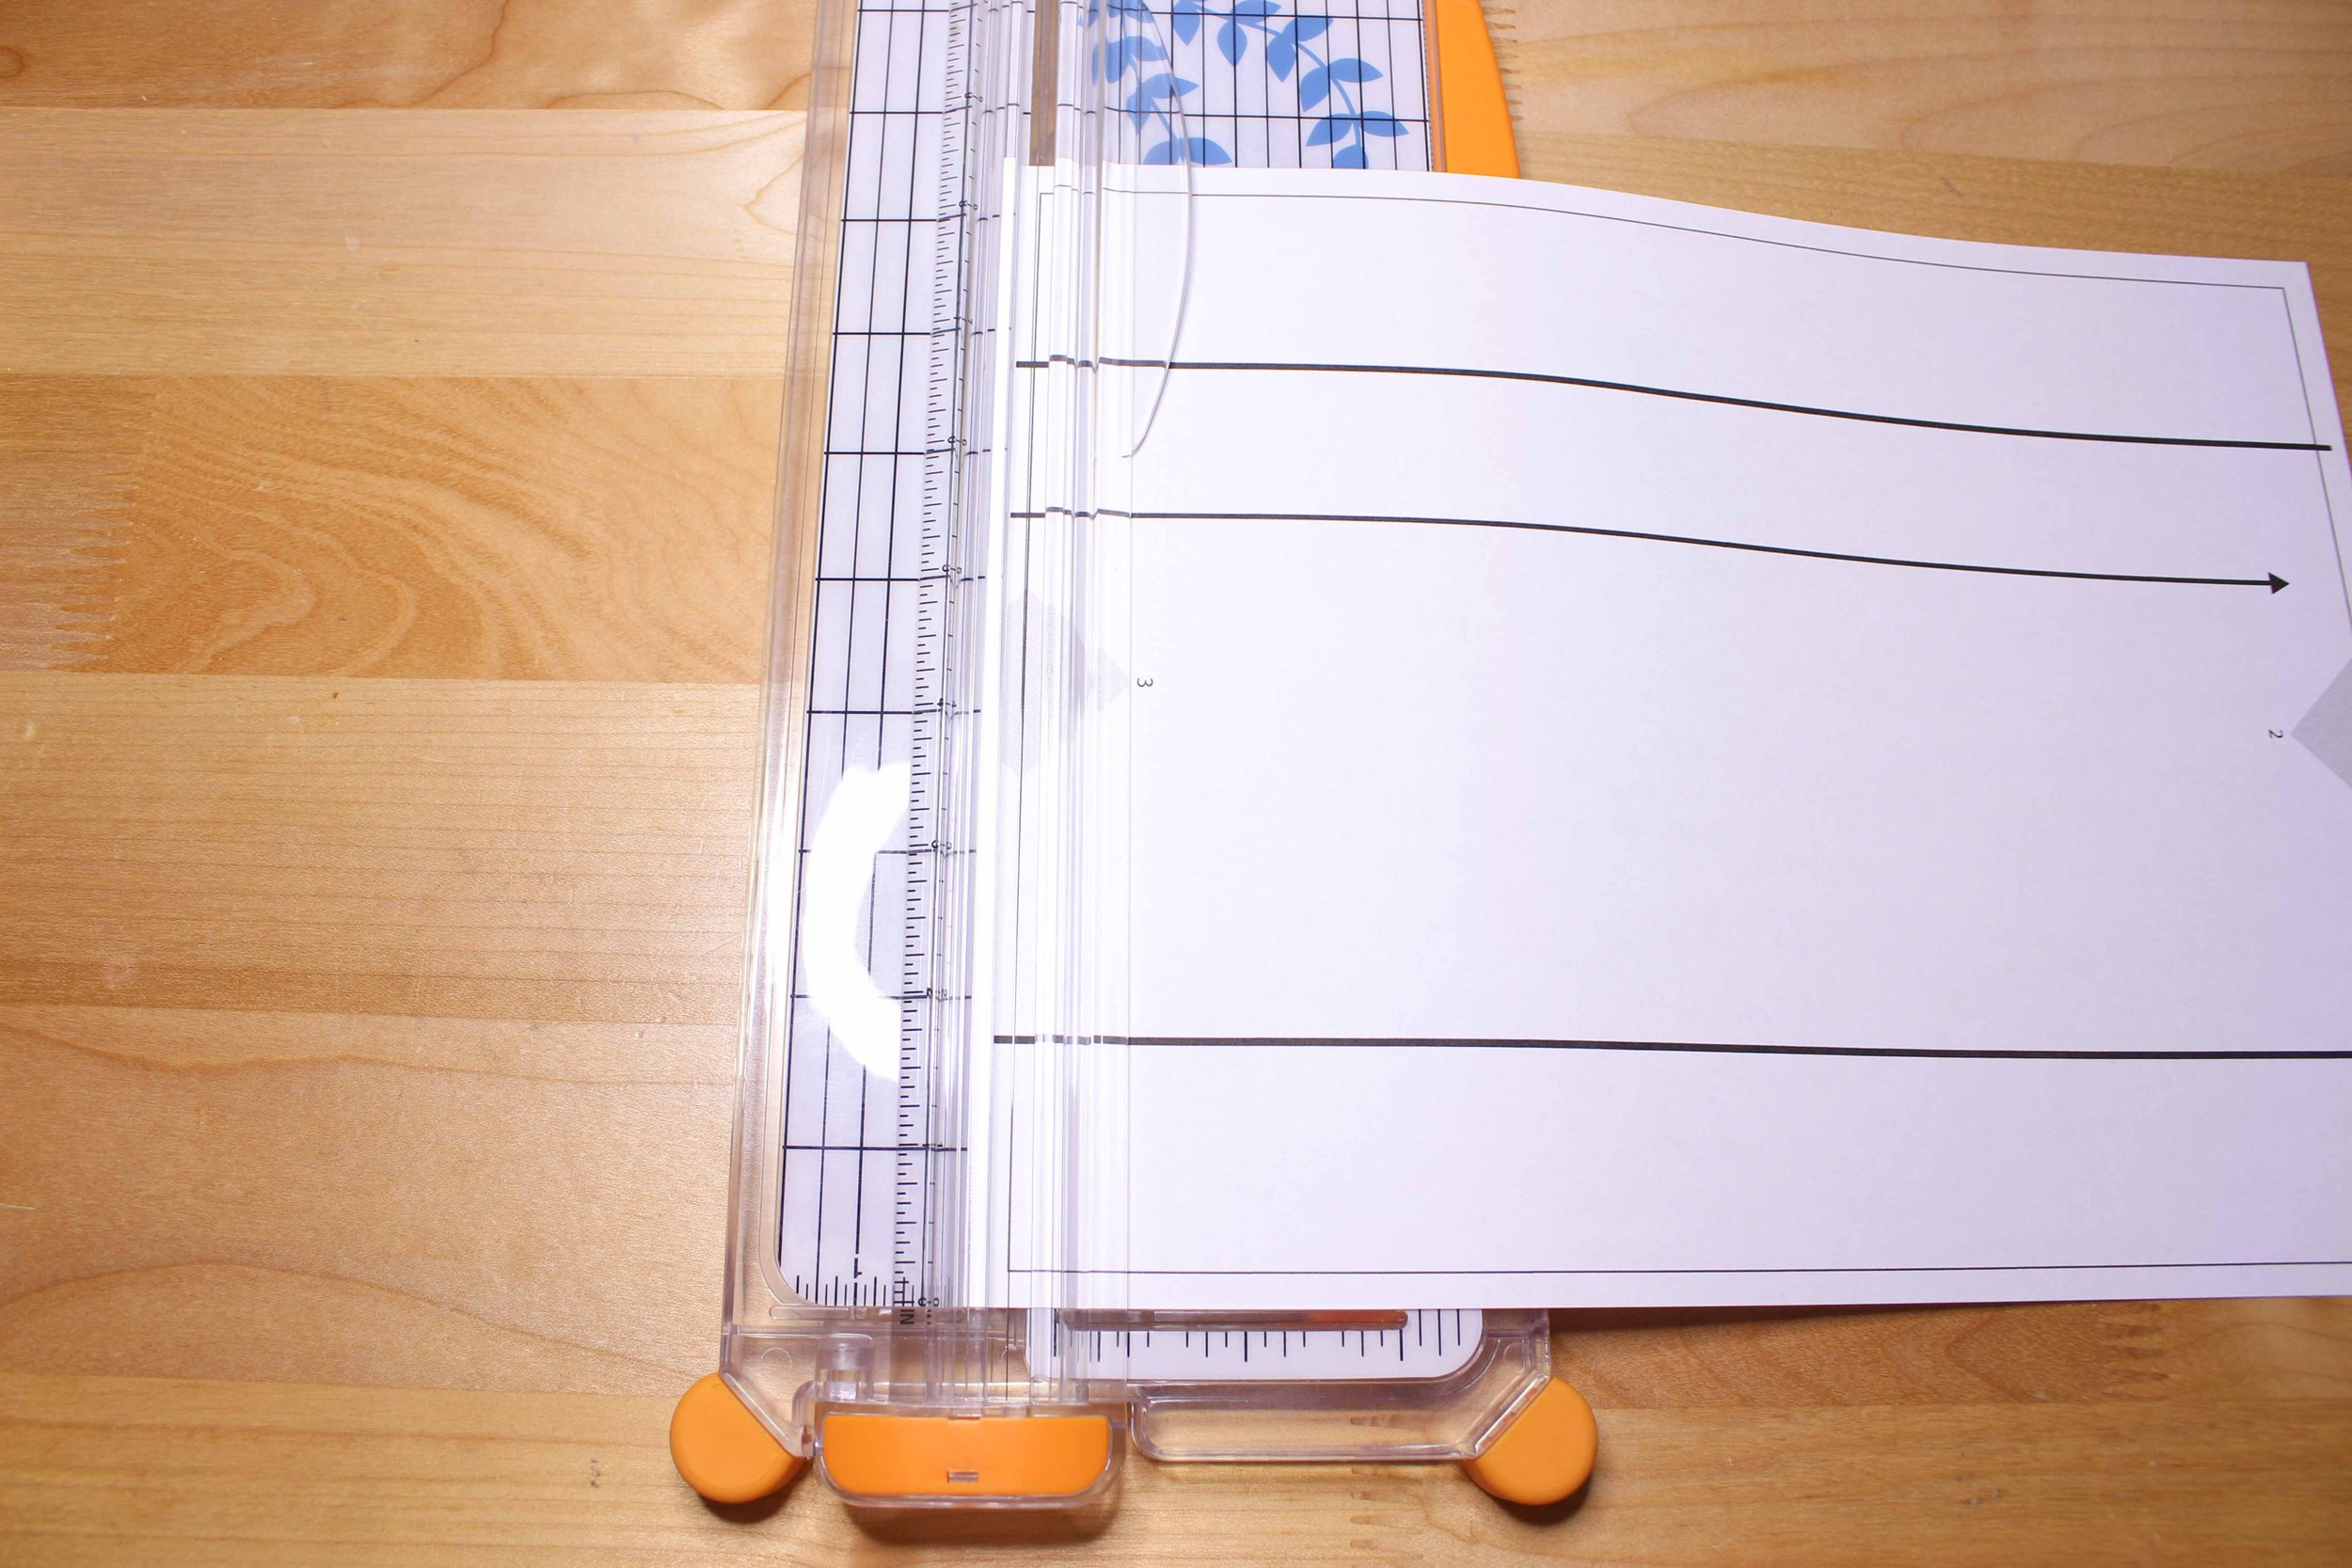
The sewing pattern has lines along the margins, which will act as your cutting guides. Make sure you are cutting exactly on the line for both the bottom edge and the right side margins.
Step four: Glue together the PDF pattern pages
For this next step, you can use either glue or tape. I have found success with both mediums, but I find glue to be less expensive.
If you are using the Free Yoga Mat Strap Sewing Pattern intended for this tutorial, there is only one column of eight pages, making assembly very simple.
If you are using any other sewing pattern, your pattern will be divided into rows and columns. Rows go horizontally across, and columns go vertically up and down.
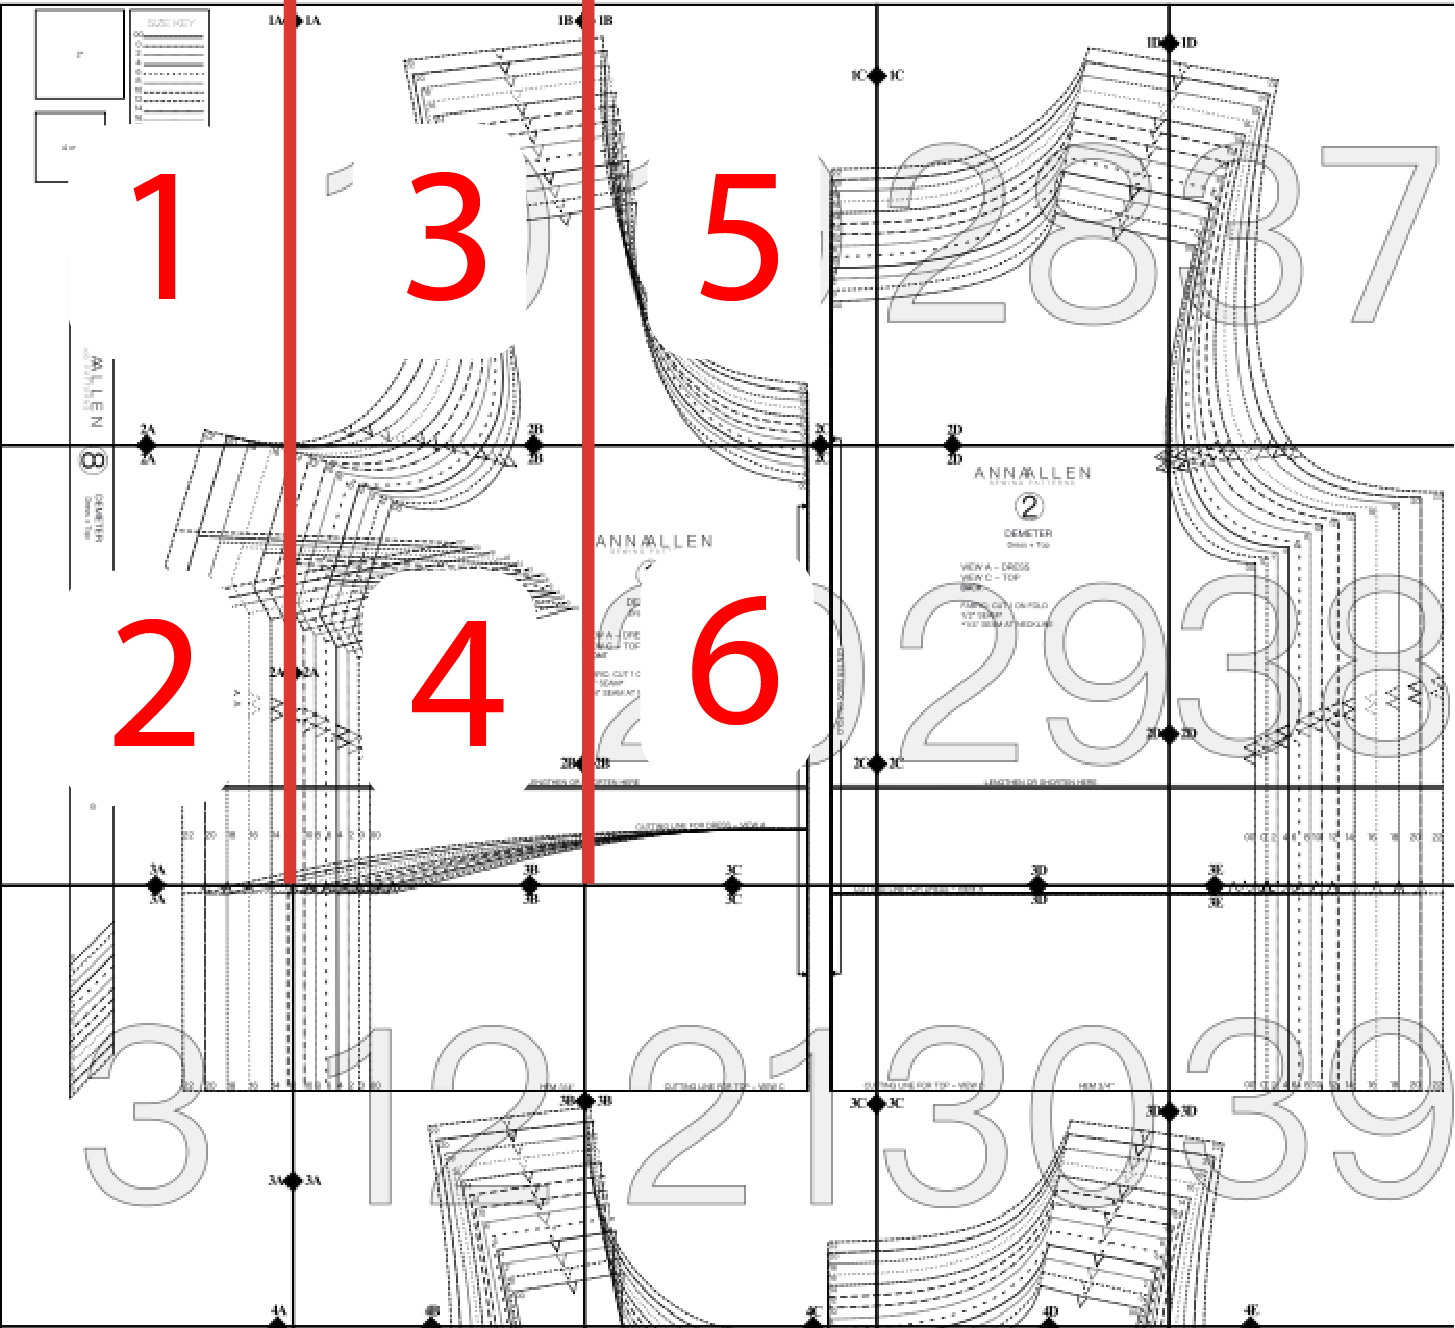
When taping together a PDF sewing pattern, I like to piece together the first two pages in column one, then the first two pages in column two, attaching column two to column one, and continuing this until the first two rows are complete. While it might add some complication, I have found that it helps maintain the page alignment a little bit better, especially if you are working on the floor.
Referring to the chart above, if you are using glue, apply glue to the top edge of piece two, and piece together the bottom of piece 1 to the top of piece 2. The pattern will have circles, diamonds, or squares in the center of each edge that you can line up with each other to make sure you have the pattern completely aligned.

If you are using tape, align the bottom edge of piece 1 to the top edge of piece 2, and tape together along that edge. It is helpful to also tape the back edge of this seam.
Step five: Finish assembly and cut the pattern
Once you have the pages all glued or taped together, the hard part is done! Now, all you need to do is cut the pattern out and you are ready to begin sewing.
If you found this tutorial helpful, comment down below!
Related Posts
Free Beginner-Friendly Yoga Mat Strap Sewing Pattern