
Making my wedding dress: choosing the patterns
Welcome back to my wedding dress series, where I walk you through the entire process of making my wedding dress from scratch. In the last post, we talked about the inspiration behind this dress, and the end result I was hoping to achieve. This post will be all about the sewing patterns I used as the base for the dress, and the materials you will need before you start.
Time: 30 minutes
Materials:
It was never a dream of mine to make my wedding dress. But my imagination started flying when my (now) husband proposed to me. The idea of making my own dress felt so special and unique, and I knew I had to try it.
That, and I quickly discovered the prices for wedding dresses were well outside of my budget. I had nine months to get this dress made, and the first step was researching what sewing patterns would make this project feasible.
Buying patterns vs drafting a pattern
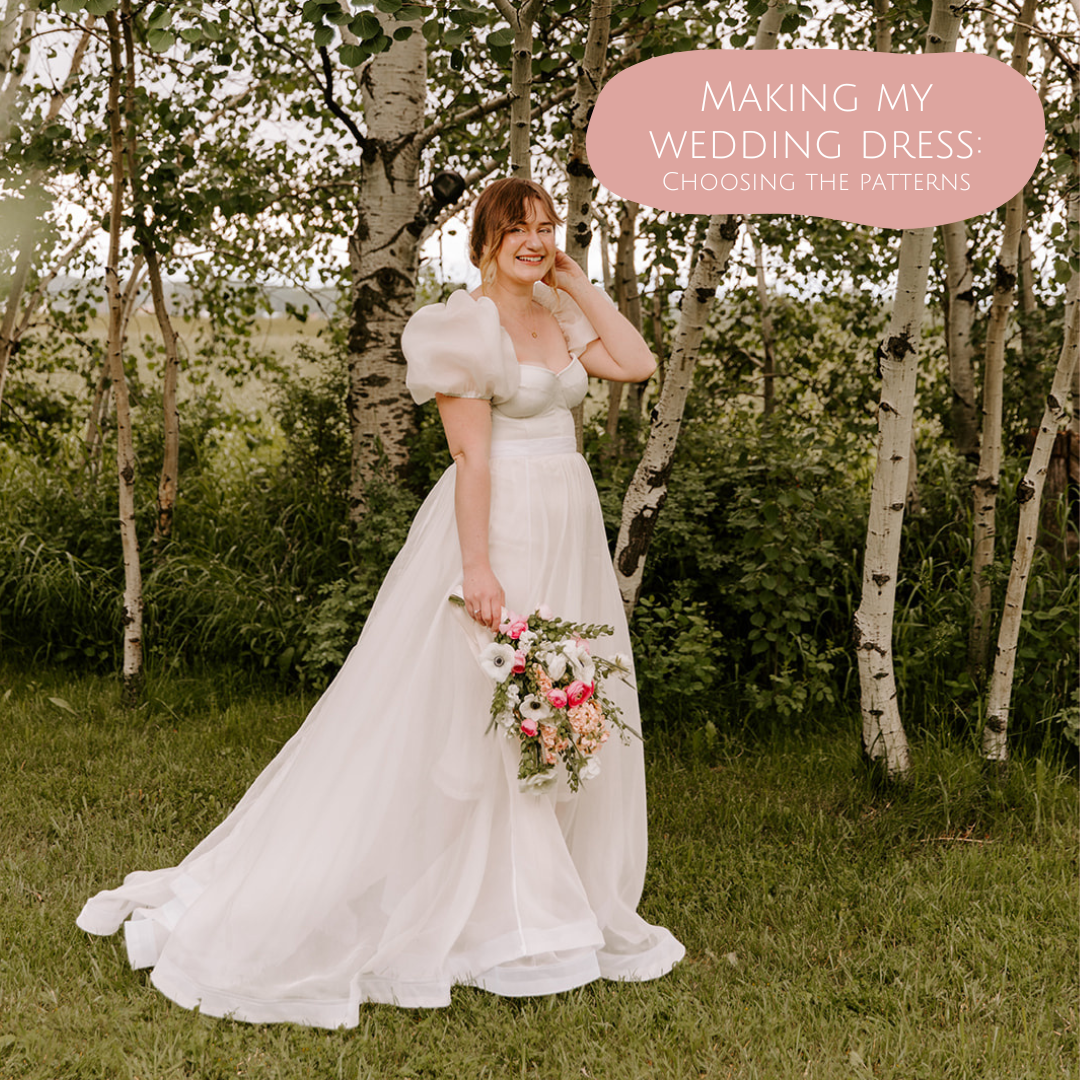
A lot of sewists in my position would have chosen to draft their own pattern, or create a garment completely from scratch. I have never drafted a sewing pattern before, so I knew that I needed to work with existing sewing patterns to get my desired dress. For my wedding dress, I knew I wanted a two-in-one dress, or a dress that could be large and formal for the ceremony, but a little more fitted and sexy for the reception. With this in mind, here is what I settled on for the silhouette:
a bustier top
a sexy slip skirt
a large, detachable over skirt
removable puff sleeves
Choosing the patterns


With the above requirements in mind, I decided to hack together the Rose Cafe Bustier by Daria Pattern Making and the Sati Skirt by Viki Sews for the reception look. For the detachable skirt, I used this Youtube tutorial as a guide, and for the puff sleeves, I used a combination of this video and this video.
Finding your size
The first step is finding your size for all the patterns. Both of these patterns are European, so be sure to look at the U.S. sizing when selecting your size. I ended up making several test versions of the dress, but my final size choice ended up being my normal U.S. size.
For all of Viki Sews’ patterns, you can only buy one size at a time. If you are between two sizes, go for the smaller one. The pattern includes a little bit of ease for an elastic waistband, which we will not be using, so you will have a little wiggle room. We’ll also be adjusting the Sati Skirt pattern so that our seams match up with the bustier top, so exact sizing isn’t super important here.
For the bustier pattern, go with your traditional bra size (I actually sized down here, because I wanted my boobs to have their moment). I made the mistake of going based on the measurement technique found in the pattern’s instructions, and I ended up making the cup size five sizes too big at first. Since the rest of the pattern pieces are based on the cup size, I ended up making five different bustier tops before I found a size that worked.
Printing the pattern
I chose these patterns because I was able to print them at home, meaning if I messed up and needed a different size, I could easily just print a new copy of the pattern. Print and tape the pattern pieces together. Don’t cut them yet, we will be altering the patterns slightly in the next post. For the bustier top, print two - one for the lining, and one for the outer fabric. I like to do this so that I can cut all of my fabric at once, without having to re-pin the pattern pieces as I go.
In the next post, I will walk you through adjusting the bustier top pattern, and the Sati Skirt pattern, so that they fit together seamlessly.