
How to make wedding place markers
My husband made these place cards - they’re one of the few things for the wedding that I didn’t personally DIY. They were so simple to make, and we were able to personalize them with our theme and colors. All you need is a Cricut, cardstock, and some glue.
Time: 1 hour
Materials:
Printer
Step one: Customize your place cards

I did this project entirely in Canva and Cricut Design Space. Using this template, go into Canva and add each of your guests’ names onto a place card. Download the file so that we can import it to Cricut Design Space.
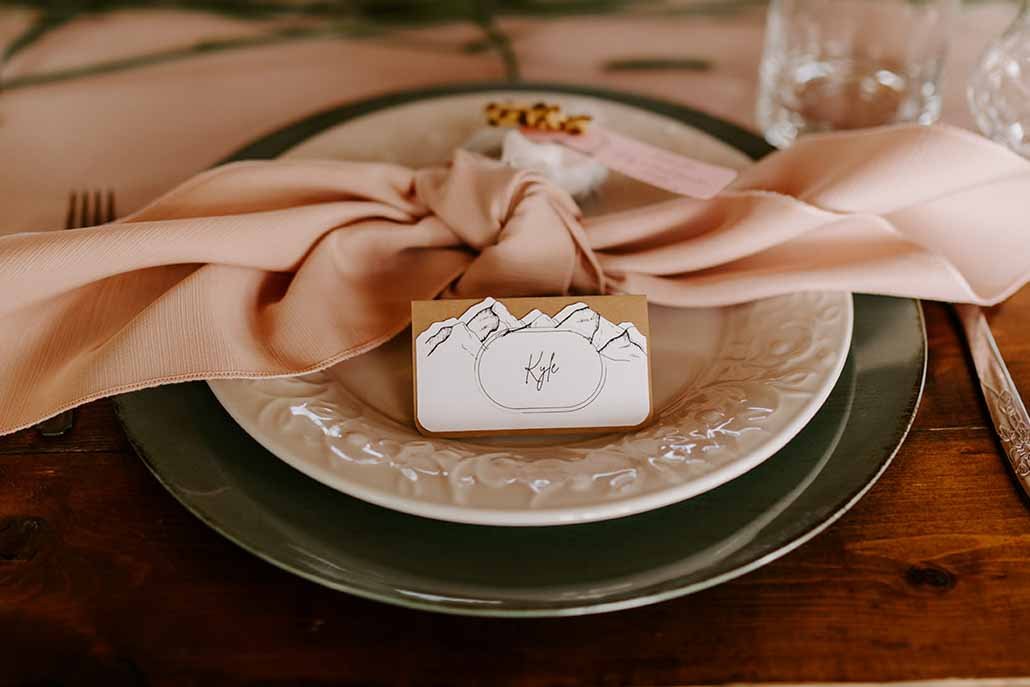
Step two: making the base

Next, you are going to cut out the base for the place cards. Using any color of your choice, cut these cards. If you have a scoring wheel for your Cricut, it will make your life a lot easier when it comes time to assemble the place cards.
Step three: import the place card files into Cricut Design Space

We’re going to use Cricut’s “Print and cut” function here. This function will configure the printing layout to make it optimal to cut on the Cricut. Print the place cards on white card stock, put them on your Cricut mat, and select “Make it.”
Step four: putting it all together
At this point, you should have the base of your place card, as well as the print out with your guests’ names. Now all that’s left is attaching the names to the base of the card. Fold your base along the scored edge in the center. Using the glue roll thing, glue the back of the names and attach to the center of the place cards.
After you complete all of the cards, you’re done! My husband and I also used these place cards to label our catering, desserts, and drinks, and we had a few extras on hand the day of the wedding, just in case.
